Plugin Tutorial Part 1 - Harold's Default and Dash Poses


TAA_CharacterPoses is a powerful plugin. Understanding how to work with it can be a bit challenging, but once you do you'll see it is not that hard. To help with the understanding part, follow me while configuring a few poses. Everything I show you here is already configured into my demo project, which you can download here and see the results for yourself.
Since there is a post length restriction here, I'll need to break this tutorial in smaller parts. In this post we'll focus on setting up Harold's default and dash poses. On part 2 we'll go crazy setting up his idle pose, part 3 will deal with his balloon poses, and part 4 with event pose templates.
OBS: All images used in the tutorial series were taken from the MV editor. If you're an MZ owner don't worry, the setup I'll explain here is pretty much the same on both. The only difference is really on Plugin Commands, which are actually easier to use in MZ than MV.
Default pose
Go to the Plugin Manager and select the TAA_CharacterPoses plugin. Open the "Actor Poses", then start another configuration, define the actor ID parameter, which in our case is 1 for Harold, then open the "Actor Poses" config.
Lets start with the default pose. This is the one used for walking around. If you don't configure a default pose the plugin will automatically build one for each actor using the character images defined at the database.
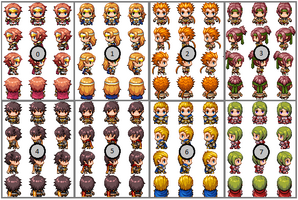
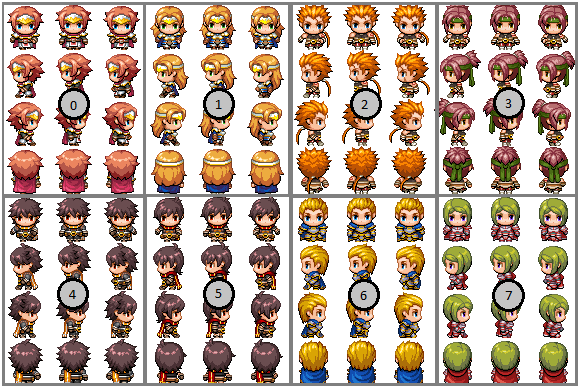
So, before setting up our pose, we need character sprites. As an example, take the Actor1.png file from RPG Maker MV:

As I've identified above, each character has an index (Harold's is 0), which identifies which sprite set must be used. RPG Maker, by default, allows two types of character files, one with 8 sprite sets like above, and another with a single sprite set (those with filenames starting in $). We'll deal with a single character file in a bit.
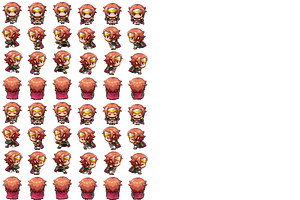
So, we have our default walking sprites. But to make the character blink we need another set with characters with eyes closed. I'll save this file as Actor1_blink.png, which makes it easy for me to know what it is.
Ok, now we're finally ready to setup the default pose. Go back to RPG Maker and open the pose configuration window.
First of all, the Pose Key must be unique for the actor. In this case, 'default' is a special pose which the plugin recognizes as the one to use for walking around. You can change the default pose through plugin commands later if you wish.
After defining the pose key, choose Spritesheet files for both normal and blinking characters (the one with the eyes closed). You also need to tell the plugin which index to use (remember what I told you a bit earlier). In our case, we're using the Actor1 file for normal sprites and Actor1_blink for closed eyes sprites. For both the index used is 0, as Harold is at the upper left corner on both files. Since we don't want to customize the animation pattern, you can leave Pattern blank and can ignore Speed (as it only affects poses with custom patterns).
That's it! Harold's default pose is ready to go. Save your project and check the result! Next I'll show you another example with a few changes for his dash poses.
Harold's dash pose
The next example follows the same process as the first, with only a few small changes. I'll go through it anyway and setup two dash poses using the same spritesheet file:

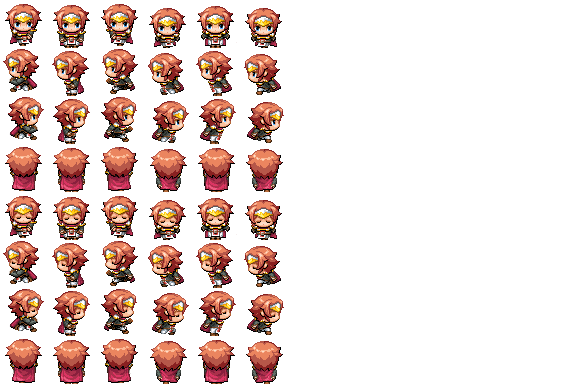
Here we have Harold running with two different sets of sprites. In the first row we have him running with open eyes, and the lower row with closed eyes for blinking. This file has four blank character sprite sets (indexes 2, 3, 6 and 7), only indexes 0, 1, 4 and 5 will be used.
The dash pose is another plugin reserved pose. Similar to the default pose, the exact name should be used to make sure the pose is recognized when the character starts running. I'll call them 'dash' (the default one) and dash2, which we can change to using plugin commands.
There's little difference between both of them, only the sprite set indexes. We're still not using custom patterns, so Pattern is left blank and Speed is ignored. After this, save your project and check the results. The dash pose will be automatically triggered whenever dash is enabled (which can happen by holding down shift or turning on "Always Dash" from the options.
-----------------------------------------------------------------------
And that's it for the first part. See you on part 2!
Get Character Poses Plugin
Character Poses Plugin
More posts
- Changelog: Version 1.3.7Aug 05, 2025
- Changelog: Version 1.3.6Jun 07, 2025
- Changelog: Version 1.3.5Feb 18, 2023
- Changelog: Version 1.3.4May 02, 2022
- Changelog: Version 1.3.3Jun 15, 2021
- Changelog: Version 1.3.2Apr 04, 2021
- Changelog: Version 1.3.1Apr 02, 2021
- Changelog: Version 1.3.0Mar 25, 2021
- Changelog: Version 1.2.4Dec 24, 2020
- Changelog: Version 1.2.3Oct 19, 2020
Comments
Log in with itch.io to leave a comment.